

Showing posts with label Pinterest. Show all posts
Showing posts with label Pinterest. Show all posts
Friday, February 24, 2012

Tuesday, February 21, 2012
Crock Pot Broccoli Cheese Soup
Nothing says Happy Valentine's Day like a brand new Crock Pot, right?
 Well that's what I asked for this year for Valentine's Day. Our other crock pot we got for our wedding in 2000. It still works, but it has 2 sections. One larger and one smaller section - which is great if you are cooking two different things at once. But it makes it hard making larger dishes. We tried this bad boy out last week and I love it.
We tried a recipe I found through Pinterest on 365 Days of Slow Cooking. My hubby loves Broccoli Cheese Soup so I figured I'd try this recipe out. Here are the details...
INGREDIENTS:
Place potatoes, carrots, onions, bouillon, and salt in slow cooker. Cover and cook on LOW for 6 hours. Stir in warmed milk, pepper, broccoli, and cheese. Cover and cook on HIGH for an additional 15 minutes or until cheese is melted and broccoli is soft.

OUR OPINIONS/COMMENTS:
ME: I ended up using frozen broccoli since I didn't have any dehydrated broccoli. Cooking time remained the same - but I added a full cup of frozen broccoli and it seemed to be the perfect amount. I liked the recipe - it was quite good. HOWEVER...The cheese makes the soup taste a bit oily. I would probably cook this again with 1/2 the cheese this recipe calls for.
ROB: Rob liked it...but he also tasted the oiliness from the cheese.
B: he ate the potatoes and the broccoli out of it - but not the soup part. He thought it was OK. But then again, he's not much of a soup person. He did say he prefers my potato soup over this recipe.
We tried a recipe I found through Pinterest on 365 Days of Slow Cooking. My hubby loves Broccoli Cheese Soup so I figured I'd try this recipe out. Here are the details...
INGREDIENTS:
- 2 lbs red potatoes, peeled and cut in to 1/2 inch cubes.
- 3/4 cup grated carrots
- 3T dehydrated onions or 1/2 cup finely chopped fresh onions
- 3 cups of chicken stock or chicken bouillon
- 1/2 tsp salt
- 1 cup warmed whole milk
- 1/4 tsp black pepper
- 2 cups shredded medium or sharp cheddar cheese
- 1/2 cup freeze-dried broccoli
Place potatoes, carrots, onions, bouillon, and salt in slow cooker. Cover and cook on LOW for 6 hours. Stir in warmed milk, pepper, broccoli, and cheese. Cover and cook on HIGH for an additional 15 minutes or until cheese is melted and broccoli is soft.
OUR OPINIONS/COMMENTS:
ME: I ended up using frozen broccoli since I didn't have any dehydrated broccoli. Cooking time remained the same - but I added a full cup of frozen broccoli and it seemed to be the perfect amount. I liked the recipe - it was quite good. HOWEVER...The cheese makes the soup taste a bit oily. I would probably cook this again with 1/2 the cheese this recipe calls for.
ROB: Rob liked it...but he also tasted the oiliness from the cheese.
B: he ate the potatoes and the broccoli out of it - but not the soup part. He thought it was OK. But then again, he's not much of a soup person. He did say he prefers my potato soup over this recipe.
Monday, January 30, 2012
Banana Ice Cream
I'm not sure why I named this Banana Ice Cream. When I think of the words "banana ice cream" I think of my step dad making my brother and I mini banana splits. My brother used to call those "banana ice cream" when he was younger. But I just don't know what else to name this.
This is another recipe I found on Pinterest. The recipe came from THIS website. Now, the below photo is the photo that is in the pin I found on Pinterest.
Does that not look like a yummy, delicious Frosty from Wendy's? When I saw this - I thought "YUMM-O! I must try this"
The recipe calls for 1 frozen banana and 2 tbsp of cocoa powder. BINGO - I have both of those! You blend it up and are supposed to come up with the above photo.
WARNING: For the faint at heart. This is by far the WORST photographic journaling AND nastiest photos I think I've ever taken. But I must document both my wins and my failures :)
Below: The banana (frozen) and 2 tbsp of cocoa powder in the blender.

Let me give this small word of advice: If you do choose to try this recipe out. I suggest you cut the banana up BEFORE you freeze it. Trying to blend a frozen banana + the cocoa powder isn't the easiest thing.
Below: towards the end of my blending attempt. Looking a little better (??). {Honestly, it looks gross!}

Below: The end product. Not quite the same as the first picture in the post. The photo that lured me in to making this.

Our opinions:
Rob: Really liked it. But then again he REALLY loves bananas.
Brad: It's ok. "Very banana-y"
Me: eh. I wouldn't make it again. A little too banana-y (as Brad puts it). I think the "look" of it from the photo on Pinterest made me think it was one thing when it was quite the other. But if you love bananas and chocolate...this is a healthy dessert alternative for you!!
This is another recipe I found on Pinterest. The recipe came from THIS website. Now, the below photo is the photo that is in the pin I found on Pinterest.
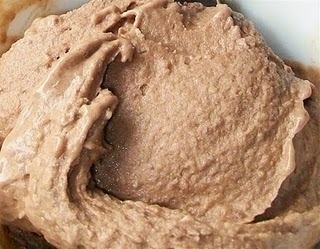 |
| (Photo credit.) |
The recipe calls for 1 frozen banana and 2 tbsp of cocoa powder. BINGO - I have both of those! You blend it up and are supposed to come up with the above photo.
WARNING: For the faint at heart. This is by far the WORST photographic journaling AND nastiest photos I think I've ever taken. But I must document both my wins and my failures :)
Below: The banana (frozen) and 2 tbsp of cocoa powder in the blender.
Let me give this small word of advice: If you do choose to try this recipe out. I suggest you cut the banana up BEFORE you freeze it. Trying to blend a frozen banana + the cocoa powder isn't the easiest thing.
Below: towards the end of my blending attempt. Looking a little better (??). {Honestly, it looks gross!}
Below: The end product. Not quite the same as the first picture in the post. The photo that lured me in to making this.
Our opinions:
Rob: Really liked it. But then again he REALLY loves bananas.
Brad: It's ok. "Very banana-y"
Me: eh. I wouldn't make it again. A little too banana-y (as Brad puts it). I think the "look" of it from the photo on Pinterest made me think it was one thing when it was quite the other. But if you love bananas and chocolate...this is a healthy dessert alternative for you!!
Saturday, January 21, 2012
Creamy Mexican Crockpot Chicken
This week I experimented on another recipe I found on Pinterest. My friend Jen, had also made this and thought it was good so I felt pretty confident about making another mystery chicken dinner for my fam.
The recipe comes from The Larson Lingo blog. Yet another recipe I was drawn to because of the simplicity of it!
INGREDIENTS:
- Bag of frozen Chicken Breast Tenderloins (2.5-3lb bag)
- 8 oz block of cream cheese (don't use Fat Free! 1/3 less fat or regular is fine)
- Can of Black Beans, drained & rinsed. (or Pinto Beans if you prefer)
- Can of Corn, drained.
- Can of Rotel
DIRECTIONS:
If you let it sit in the crockpot for about 45 min or so after turning the crock pot off, it will become less soupy. You can serve it over rice, make tostadas, etc. Be creative!
Brad's reaction: N/A - He's getting over a "virus" and is on a bland diet.
Rob's reaction: Loved it!
My reaction: Not sure. I had to take a few deviations from the original recipe due to poor shopping on my part. (I normally don't keep canned veggies in the house, and picked up cream corn instead of corn kernals.) But I'm willing to give it another shot with the RIGHT ingredients.
No Photos on this recipe...but check out The Larson Lingo blog for great step by step photos!
The recipe comes from The Larson Lingo blog. Yet another recipe I was drawn to because of the simplicity of it!
INGREDIENTS:
- Bag of frozen Chicken Breast Tenderloins (2.5-3lb bag)
- 8 oz block of cream cheese (don't use Fat Free! 1/3 less fat or regular is fine)
- Can of Black Beans, drained & rinsed. (or Pinto Beans if you prefer)
- Can of Corn, drained.
- Can of Rotel
DIRECTIONS:
- Put frozen chicken in the crock pot.
- Put Cream cheese on top of the chicken.
- Dump in the Black Beans (make sure they are drained & rinsed!!!)
- Dump in the drained corn.
- Dump in the Rotel
- Cover & cook in your Crock Pot on low for 6-8 hours.
- Every 2 hours, I stir the ingredients.
- You can shred the chicken when it is done, or just leave it as tenderloins. ( I shredded it)
If you let it sit in the crockpot for about 45 min or so after turning the crock pot off, it will become less soupy. You can serve it over rice, make tostadas, etc. Be creative!
Brad's reaction: N/A - He's getting over a "virus" and is on a bland diet.
Rob's reaction: Loved it!
My reaction: Not sure. I had to take a few deviations from the original recipe due to poor shopping on my part. (I normally don't keep canned veggies in the house, and picked up cream corn instead of corn kernals.) But I'm willing to give it another shot with the RIGHT ingredients.
No Photos on this recipe...but check out The Larson Lingo blog for great step by step photos!
Thursday, January 19, 2012
Calzone Rolls
While recovering from my knee surgery I became addicted to the Food Network. So now, if I'm stuck at home sick...or watching my little guy while he's sick...we turn to the Food Network for our daytime TV fix. While watching Rachael Ray, I came across a recipe that looked simple and yummy...my two favorite descriptions when it comes to cooking! I found it on her website...and pinned it for future use! {Pinterest...where were you all my life?}
Calzone Rolls
INGREDIENTS:
Heat the oven to 325°F.
Calzone Rolls
INGREDIENTS:
- 4 large, crusty Kaiser rolls
- 1 1/2 cups ricotta cheese
- Salt and pepper
- 1/4 pound salami, chopped
- 1/4 cup Parmigiano Reggiano cheese
- 8 slices fresh mozzarella
- 8 slices vine-ripe tomatos
- 8 fresh basil leaves, torn or sliced (I didn't have any on hand...so I put some dried basil in the Ricotta Cheese mix)
Heat the oven to 325°F.
Split the Kaiser rolls favoring the bottom half a little. Scoop a little of the white soft insides out of the bottoms.
Season the ricotta with a little salt and pepper. Stir the salami and grated cheese into ricotta. Fill the rolls with the ricotta and salami. Cover the ricotta with mozzarella, tomato and basil. Set covers in place and bake to heat through 10-12 minutes. Cut in half and serve.
 |
| Kaiser Rolls - Cut in Half |
 |
| Ricotta Cheese & Salami Mix added to Kaiser Rolls |
 |
| Add Mozzarella & Tomato |
 |
| Bun Tops go back on and everything in the oven! |
 |
| 10-12 minutes later - DING! They're ready! |
 |
| All done! Cut in half and enjoy! |
Rob's reaction: Like it - but needs more meat. (What else would a guy say?)
Brad's reaction: Like it - but without the tomato. (What else would a kid say?)
My reaction: Love it (especially warmed up the next day as left overs). Would recommend possibly removing the top of the roll for a bit while in the oven so the goodies inside are warmed up a bit more. Will definitely use this recipe again!
Friday, January 6, 2012
Baked Turkey Sandwiches
Another Pinterest recipe....I'm on a roll. Especially with the easy-peasy recipes!
The recipe is originally from a blog post from Simple Organized Living. We tried this recipe out on Wednesday night. Everyone seemed to like it (though Brad admitted doesn't like mustard anything too much). It makes about 12 sandwiches and was super quick in terms of preparation time.

I was a bit disappointed that I was not able to find the brown & serve rolls at my grocery store - I think that would have made the recipe so much better! I also didn't use the poppy seeds. Instead, I added fresh, ground pepper. Still came out yummy :)
The recipe is originally from a blog post from Simple Organized Living. We tried this recipe out on Wednesday night. Everyone seemed to like it (though Brad admitted doesn't like mustard anything too much). It makes about 12 sandwiches and was super quick in terms of preparation time.
I was a bit disappointed that I was not able to find the brown & serve rolls at my grocery store - I think that would have made the recipe so much better! I also didn't use the poppy seeds. Instead, I added fresh, ground pepper. Still came out yummy :)
The Recipe for 1 Dozen Sandwiches:
Sandwiches:- 1 dozen Brown n’ Serve rolls
- 1/2 to 3/4 lb. sliced deli meat
- sliced cheese — enough to fit on each bun
- 1/2 c. butter
- 2 T. brown sugar
- 1 T. mustard
- 1 T. Worcestershire sauce
- 1 T. Poppy seeds
- Put sandwiches together and place in a 9×13” pan
- Boil sauce until bubbly and pour over sandwhiches.
- You can either bake immediately or let sit for several hours or even over night.
- Bake in a 350*F preheated oven for 20-30 minutes, or until the tops are brown and crispy.
Thursday, January 5, 2012
Black Eyed Pea Dip
In the South, it is tradition to have Black Eyed Peas on New Years Day. Before my mom and I moved to CA when I was in elementary school, I can remember heading over to my aunt and uncles houses to have a bowl of Black Eyed Peas to bring good luck in the new year. As an adult, I've started getting back in to that tradition over the last several years.
In all honesty, BEP's can be a bit of a pain to cook. I sometimes have the attention span of a 10 year old when I cook, so easy recipes are my fav!
While on Pinterest, I found a recipe from the Pioneer Woman (courtesy of the High Heeled Hostess) for a Black Eyed Pea dip (Zannie's Black-Eyed Pea Dip) that cut a few corners to make it an easy recipe that I wouldn't have to spend all day in the kitchen with. Here's the Recipe:
The recipe turned out quite yummy. The dip was gone pretty quick and I definitely plan to make it again!
In all honesty, BEP's can be a bit of a pain to cook. I sometimes have the attention span of a 10 year old when I cook, so easy recipes are my fav!
While on Pinterest, I found a recipe from the Pioneer Woman (courtesy of the High Heeled Hostess) for a Black Eyed Pea dip (Zannie's Black-Eyed Pea Dip) that cut a few corners to make it an easy recipe that I wouldn't have to spend all day in the kitchen with. Here's the Recipe:
Ingredients
- 1 can (14-ounce) Can Black-eyed Peas
- 1/4 whole Onion, Chopped Fine
- 1/4 cup Sour Cream
- 8 slices Jarred Jalapenos
- 1 cup Grated Sharp Cheddar Cheese
- 3 Tablespoons Salsa
- Hot Sauce, to taste
- Salt And Black Pepper To Taste
Preparation Instructions
- Preheat oven to 350 degrees. Drain black-eyed peas and partially mash, leaving some whole.
- Add all other ingredients, stirring to combine.
- Spread into a 1.5 quart baking dish and bake for 20 to 30 minutes until hot and bubbly.
- Serve with tortilla chips
- Note: if you have them available, you can use the canned black-eyed peas and jalapenos. (They come canned together sometimes) If you do this, you can omit the extra jalapeños.
 |
| My version of the Black Eyed Pea Dip (not the best photo) |
For step by step instructions, including the beautiful photos of the Pioneer Woman, click here:
Wednesday, December 28, 2011
Composition Book Trip Journal
I took a ton of photos from my trip (see trip details here, here, here, here, or here) with my mom. And knew before I even left, that I wanted to memorialize our trip in a scrapbook/journal of some kind and give to my mom as a Christmas gift. I have a thing for composition books (specifically graph paper ones). I know...kinda weird. But I thought a composition book would be a great canvas (and an inexpensive one) for this little journal.
Once again, I pulled some of my inspiration from some finds on Pinterest.
I loved Little Boo Blue's Art Journal tips. However I started my journal before I saw this...otherwise it would have (attempted) to be a little more artsy.
Isn't her journal beautiful? I loved the ribbon closure and how she sews items around her journal. I definitely want to try one like this.
I loved the below idea of outlining our route with embroidery thread on a map. I used my grandmother's old National Geographic Atlas book that had been falling apart for years. It was going to be thrown out - but I loved the old maps inside. I found a map of the Southeast coast of the US (GA and SC in particular)...and worked off this idea (thank you Martha Stewart)...
My map didn't turn out as perfect as Martha's. Mainly because I have no idea how to do embroidery and I had little patience or time...
I was a little worried about actually finishing it - and it looking half way decent. There are still a few things I wish I had done...but overall I like it (mainly because my mom liked it so much).

Mom did love it...and she was holding on to it for a while after opening all her gifts. Mission Accomplished!
If you want to see the full thing - all pages - below is a video of me flipping through the pages. It's kind of long...about 6 minutes. (The actual video screen size is small - I did something wrong when uploading it from my bloggie)
Once again, I pulled some of my inspiration from some finds on Pinterest.
I loved Little Boo Blue's Art Journal tips. However I started my journal before I saw this...otherwise it would have (attempted) to be a little more artsy.
 |
| Photo Credit: Lil Blue Boo |
I loved the below idea of outlining our route with embroidery thread on a map. I used my grandmother's old National Geographic Atlas book that had been falling apart for years. It was going to be thrown out - but I loved the old maps inside. I found a map of the Southeast coast of the US (GA and SC in particular)...and worked off this idea (thank you Martha Stewart)...
 |
| Photo Credit: Martha Stewart |
 |
| Our trip...embroidery by yours truly. |
I was a little worried about actually finishing it - and it looking half way decent. There are still a few things I wish I had done...but overall I like it (mainly because my mom liked it so much).
 |
| It ended up being very thick! |
 |
| The front was covered in scrapbook paper then Mod Podged over it. |
 |
| My step-dad and mom - Fuzzy photo (sorry!) |
If you want to see the full thing - all pages - below is a video of me flipping through the pages. It's kind of long...about 6 minutes. (The actual video screen size is small - I did something wrong when uploading it from my bloggie)
Lighted Ribbon Garland
Pinterest is a wealth of inspiration for any aspiring crafter/decorator. I love the ideas around the holidays. There were so many I wanted to try out...but I just didn't have the time.
I did try version of this one:
At first I was going to try the different colors. But then I went for all white ribbon. I got some white cotton/poly blend fabric from Joann's on clearance in their scrap bin. I also picked up some different ribbon....some crossgrain ribbon, satin ribbon, and a couple others. I also used some tulle that I had left over from my wedding (yes...it was over 10 years ago...and I still had it. I used one of our string of white lights and had to fold the lights since the string was too long. Then I just cut the strips of fabric and ribbon and tied the peices in knots around the lights. Here's the results...


 I'm pretty happy with the result! Even my dear hubby thought it looked good. I am thinking about making a string of fun lighted ribbon for our guest bedroom. (Check out Whitney Caroline Design post - see the photo of the string of lighted ribbon around the headboard - totally cute!)
I'll have to check out Valentine's Day decoration ideas on Pinterest...and get started early this time!
All Photos, except where otherwise credited, are mine.
I did try version of this one:
 |
| Photo Credit: Whitney Caroline Designs |
I'll have to check out Valentine's Day decoration ideas on Pinterest...and get started early this time!
All Photos, except where otherwise credited, are mine.
Sunday, November 6, 2011
New Craft - Clay Tags
My love of all things Pinterest resulted in trying out a craft. I was going back and forth between trying salt dough or white clay. For this trial, I used white clay that you bake in the oven for about 15 minutes per 1/4" of thickness.
I used a circle cookie cutter that was about 3" in diameter, some stamps and ribbon. Here's the result:
I wanted to keep them white & didn't mind the indentation of the stamps around the actual letters. What I did realize is I want them a little smaller. Definitely need to work on these. I like them - but some tweaks need to be made. But I definitely want to keep doing them. I think they'd be adorable on Christmas packages and can later be used as ornaments (if the recipient wants to keep them)!
I used a circle cookie cutter that was about 3" in diameter, some stamps and ribbon. Here's the result:
 |
| First attempt - Clay Holiday Tags/Ornaments (excuse the poor quality phone photo) |
Photo Credit: me
Saturday, September 24, 2011
Pumpkin Muffins
Have you been on Pinterest? Well I think the 3-4 people that read this blog are as addicted to the site as I am...so I guess the answer to that is YES.
I'm determined to not sit on my bum and just pin away...but actually take action on some of these ideas. My friend Kelly recently made a headboard that turned out beautifully. I don't know if I'm at that point of motivation yet...but I'm getting there.
I decided to start off with something super simple...Pumpkin Muffins. I found a recipe that claims that you only need 2 ingredients, mix, and pop in the oven. Bake in the oven at 350 degrees for 20-25 minutes. I had to try it to believe it!
The recipe originally comes from a blog called Sweet Verbena. Basically, you take a box of cake mix, pureed pumpkin....mix, and bake.
I do have to admit that the prep was very easy. The directions mentioned you don't need anything else to make it in to a smooth batter - and they were correct. The ingredients mix really well.
So I have to admit I was a little under prepared. I didn't have muffin/cupcake liners. So I thought...Starbucks uses parchment paper as the liner and it looks cool...why can't I? Yeah. that wasn't so easy and made it a little messy. But it worked.
I was lazy at the end...I was tired and just wanted to wrap this up as I had been cooking several things throughout the day. So I plopped (vs sprinkled) powdered sugar on top and tried one out.
I will make these again - the recipe was quite easy. However, I do think this recipe needs a little bit more spice. Definitely an easy thing to make and my son loved them...so that's a giant bonus. Especially since I cooked them for him.
I'm determined to not sit on my bum and just pin away...but actually take action on some of these ideas. My friend Kelly recently made a headboard that turned out beautifully. I don't know if I'm at that point of motivation yet...but I'm getting there.
I decided to start off with something super simple...Pumpkin Muffins. I found a recipe that claims that you only need 2 ingredients, mix, and pop in the oven. Bake in the oven at 350 degrees for 20-25 minutes. I had to try it to believe it!
The recipe originally comes from a blog called Sweet Verbena. Basically, you take a box of cake mix, pureed pumpkin....mix, and bake.
 |
| Cake batter + pumpkin puree |
 |
| Mixed ingredients |
I do have to admit that the prep was very easy. The directions mentioned you don't need anything else to make it in to a smooth batter - and they were correct. The ingredients mix really well.
 |
| Muffins - before the oven |
 |
| Muffins - cooked |
 |
| Muffins with powdered sugar on top |
I will make these again - the recipe was quite easy. However, I do think this recipe needs a little bit more spice. Definitely an easy thing to make and my son loved them...so that's a giant bonus. Especially since I cooked them for him.
Subscribe to:
Posts (Atom)